
Cauliflower Crusted Grilled Cheese Sandwiches bring everything you love about traditional grilled cheese into a delicious, veggie-packed meal. Imagine biting into a golden, crispy cauliflower crust filled with warm, gooey, melted cheese. You get that familiar comfort food experience without using regular bread. I first tried making these sandwiches when I wanted something cheesy and satisfying but had a head of cauliflower sitting in my refrigerator. After a little experimenting, I discovered that cauliflower, mozzarella, Parmesan, and a simple egg binder create a surprisingly sturdy crust.
Now, these sandwiches have become one of my favorite ways to turn everyday vegetables into something special. Whether you’re looking for a gluten-free lunch, a creative low-carb dinner, or simply a new way to enjoy cauliflower, this recipe delivers. Plus, I’ll share the simple techniques that help you achieve crispy edges, a tender center, and perfectly melted cheese every time.
- Why You’ll Love These Cauliflower Grilled Cheese Sandwiches
- Essential Ingredients for the Perfect Cauliflower Cheese Crust
- THow to Make Cauliflower Crusted Grilled Cheese Sandwiches
- Preparing the Cauliflower Crust for Crispy Results
- Baking the Crust and Creating the Perfect Cheese Melt
- WHAT TO ADD TO CAULIFLOWER GRILLED CHEESE
- SOME MORE RECIPES TO TRY
- MORE GRILLED CHEESE SANDWICHES
- Common Questions
- Conclusion: Enjoy Your Homemade Cauliflower Crusted Grilled Cheese Sandwiches
Why You’ll Love These Cauliflower Grilled Cheese Sandwiches
There’s something irresistible about a classic grilled cheese sandwich. The crispy exterior, buttery flavor, and melted cheese make it one of the most comforting meals you can prepare.
However, sometimes I want that same experience with a little more vegetable goodness.
That’s where Cauliflower Crusted Grilled Cheese Sandwiches come in.
Instead of traditional bread, this recipe uses a mixture of cauliflower rice, mozzarella, Parmesan, and egg to create two golden crust slices.
Once you bake them until firm and crispy, you can fill them with your favorite melting cheese and finish everything in a skillet.
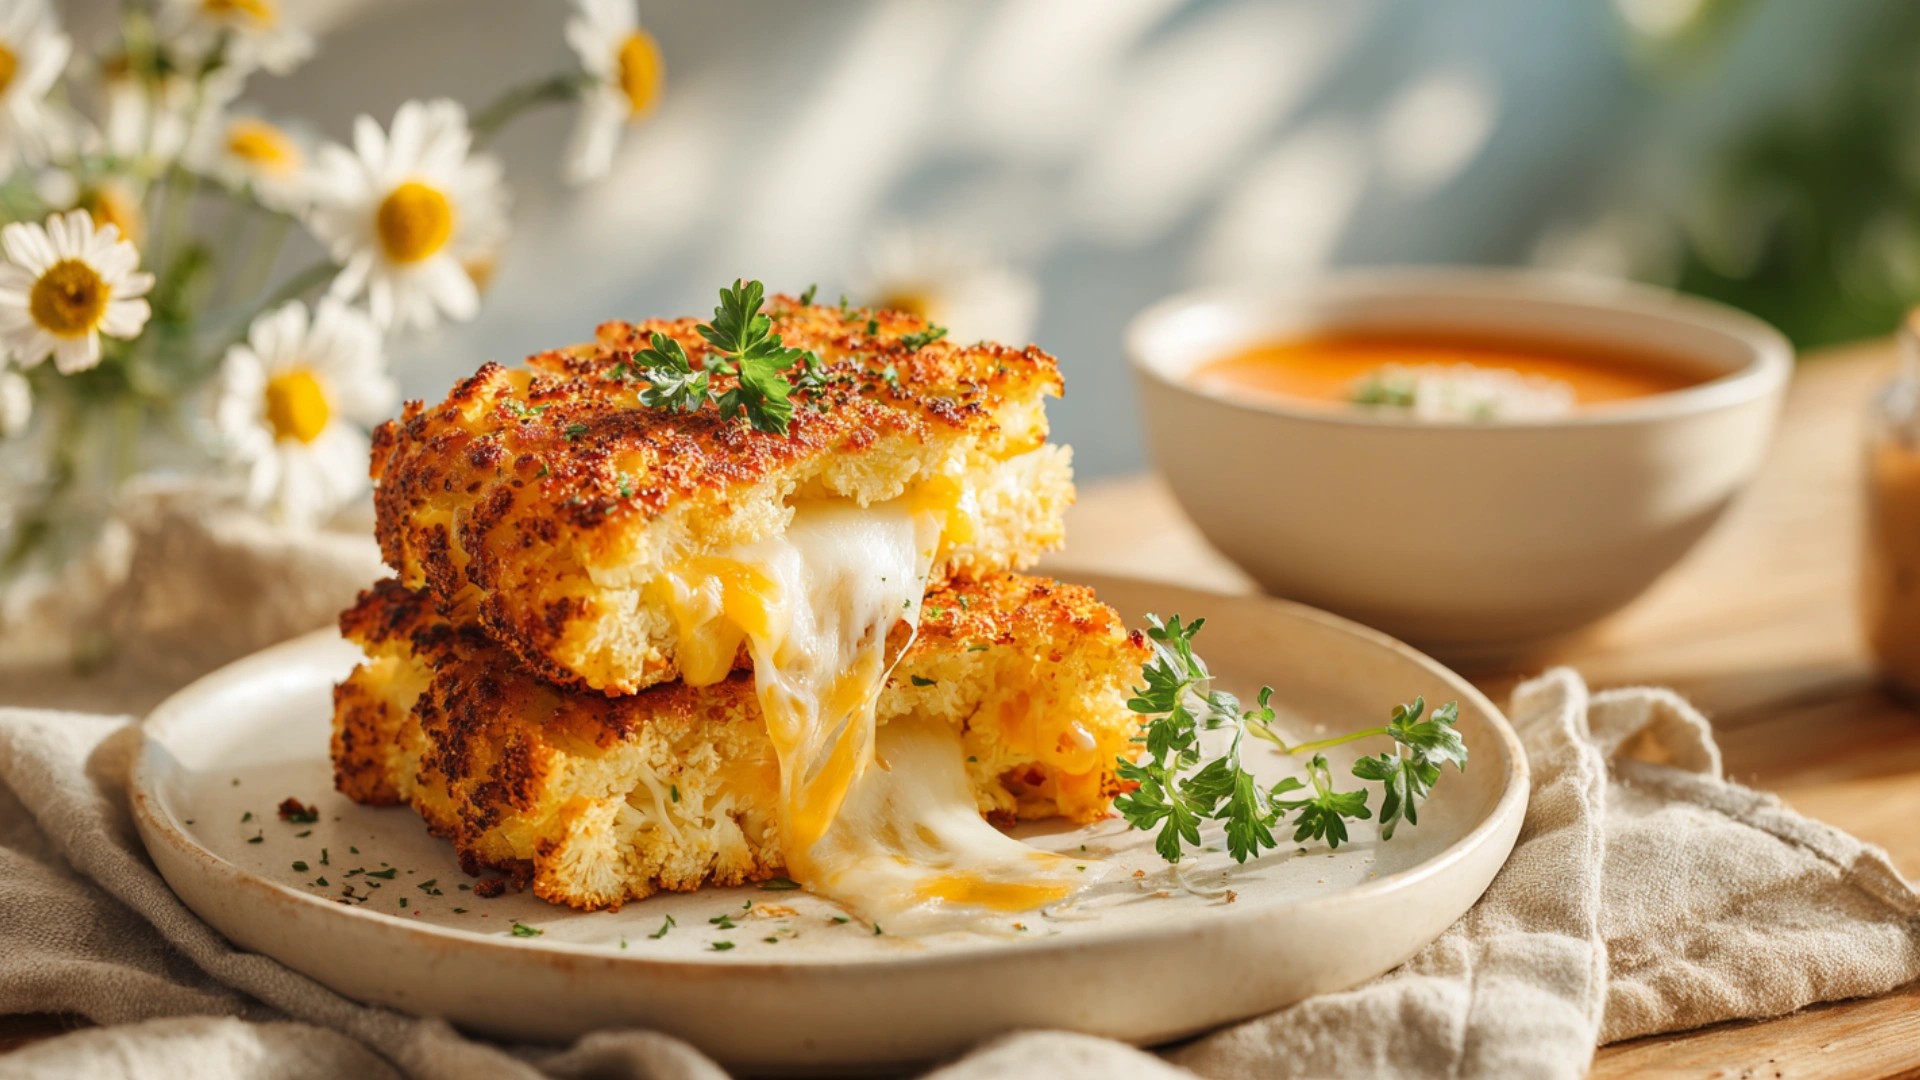
The result? A satisfying sandwich with crispy edges and a wonderfully cheesy center.
Here are a few reasons I keep coming back to this recipe.
A delicious alternative to regular bread: Cauliflower creates a flavorful crust that works beautifully with melted cheese. Additionally, it adds vegetables to a familiar comfort food.
Naturally lower in carbohydrates: Compared with traditional bread-based grilled cheese, cauliflower crust generally contains fewer carbohydrates. However, the exact amount depends on your ingredients.
Simple everyday ingredients: You only need cauliflower, eggs, cheese, seasonings, and a little butter or olive oil.
Perfect for lunch or dinner: These sandwiches work beautifully alongside fresh salads, roasted vegetables, or a warm bowl of tomato soup.
Easy to customize: You can experiment with cheddar, mozzarella, provolone, pepper jack, and different seasonings.
A creative way to enjoy vegetables: Even people who don’t usually love cauliflower may enjoy its mild flavor beneath the golden cheese crust.
Another reason I love this recipe is its versatility.
For example, when I want something more traditional, I make my Grilled Cheese Patty Melts. However, when I’m craving a vegetable-based alternative, cauliflower crust delivers a completely different experience.
And because the cauliflower crust contains cheese, it develops a delicious savory flavor as it browns.
The key is removing enough moisture before baking.
Once you master that simple technique, you’ll find that homemade cauliflower grilled cheese sandwiches are much easier than they initially seem.
Essential Ingredients for the Perfect Cauliflower Cheese Crust
The secret to delicious Cauliflower Crusted Grilled Cheese Sandwiches starts with choosing the right ingredients.
Fortunately, you don’t need anything complicated.
Most ingredients are everyday refrigerator staples, and each one contributes to the sandwich’s texture, flavor, or structure.
Ingredients for the Cauliflower Crust
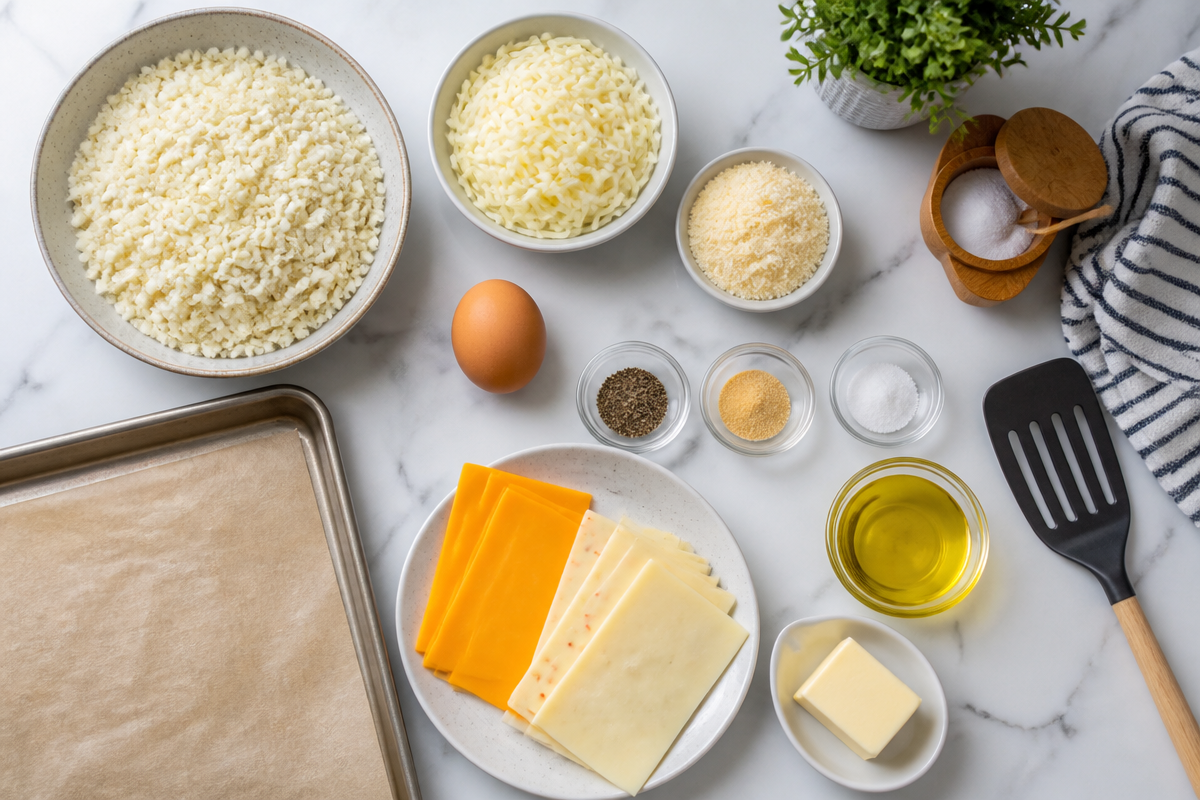
Cauliflower rice – 3 to 4 cups
Cauliflower forms the foundation of this recipe.
You can use fresh cauliflower rice or frozen cauliflower rice. However, you must cook it and remove excess moisture before mixing the crust.
Fresh cauliflower usually gives you more control over moisture, while frozen cauliflower offers convenience.
Large egg – 1
The egg helps bind the cauliflower and cheese together.
Without a binder, your crust may crumble when you flip it.
Shredded mozzarella – 1 cup
Mozzarella adds richness and helps the cauliflower mixture hold its shape.
Additionally, its mild flavor complements the other ingredients without overpowering them.
Grated Parmesan – 2 to 3 tablespoons
Parmesan brings a savory, slightly salty flavor.
It also helps the crust develop a golden exterior during baking.
Garlic powder, salt, and black pepper
These simple seasonings enhance the natural flavor of cauliflower.
I recommend starting with a small amount of salt because Parmesan already contributes saltiness.
Ingredients for the Cheesy Filling
The filling transforms your cauliflower crust into a proper grilled cheese sandwich.
My favorite choices include:
- Sharp cheddar: Adds a rich, bold cheese flavor.
- Mozzarella: Creates a stretchy, gooey center.
- Provolone: Melts smoothly and offers a mild, creamy taste.
- Pepper jack: Adds a little heat for anyone who enjoys spicy food.
For the best combination, I like mixing cheddar and mozzarella.
Cheddar provides flavor, while mozzarella creates that irresistible cheese pull.
Finally, you’ll need a small amount of butter or olive oil to crisp the assembled sandwich in a skillet.
Choosing the Best Cauliflower
When buying fresh cauliflower, look for a firm head with tightly packed florets.
Avoid cauliflower with extensive dark spots, soft areas, or an unpleasant smell.
If you’re using frozen cauliflower rice, choose a plain variety without sauces or additional seasonings.
Most importantly, remember that removing moisture matters more than whether you choose fresh or frozen cauliflower.
Excess water prevents the crust from becoming crispy and makes the sandwich harder to handle.
For another flavorful way to enjoy this versatile vegetable, try my Bang Bang Cauliflower. It offers a completely different combination of crispy texture and bold flavor.
With your ingredients ready, you’re one step closer to creating golden cauliflower crusts and a delicious melted cheese filling.
THow to Make Cauliflower Crusted Grilled Cheese Sandwiches
Making Cauliflower Crusted Grilled Cheese Sandwiches at home is easier than you might think. However, achieving that perfect combination of crispy cauliflower crust and gooey melted cheese requires a few simple techniques. The secret lies in removing excess moisture, shaping the crust correctly, and controlling the cooking temperature.
I remember my first attempt at making cauliflower grilled cheese. I rushed through the preparation, skipped squeezing the cauliflower properly, and ended up with a sandwich that practically fell apart. Fortunately, a few adjustments made all the difference. Now, I follow this straightforward method whenever I want a satisfying, cheesy meal without traditional bread.
Preparing the Cauliflower Crust for Crispy Results
The cauliflower crust is the foundation of this recipe. Therefore, preparing it correctly ensures your sandwich holds together and develops a beautiful golden exterior.
Step 1: Cook the cauliflower rice
Start with approximately 3 to 4 cups of fresh or frozen cauliflower rice.
If you’re using fresh cauliflower, pulse the florets in a food processor until they resemble small grains of rice. Alternatively, use a box grater.
Next, cook the cauliflower rice in a skillet over medium heat for approximately 5 to 7 minutes, stirring occasionally.
If you’re using frozen cauliflower rice, microwave it according to the package instructions.
The goal is to soften the cauliflower before forming the crust.
Step 2: Remove excess moisture
This step makes the biggest difference in the final texture.
Allow the cooked cauliflower to cool until you can handle it comfortably.
Then, transfer it to a clean kitchen towel or several layers of cheesecloth.
Gather the towel around the cauliflower and squeeze firmly over the sink.
Continue squeezing until you’ve removed as much liquid as possible.
Remember, dry cauliflower creates a firmer, crispier crust.
If you leave too much moisture behind, the crust may turn soft and break apart during cooking.
Step 3: Mix the cauliflower crust ingredients
Place the dried cauliflower rice in a large mixing bowl.
Add the following ingredients:
- 1 large egg
- 1 cup shredded mozzarella
- 2 to 3 tablespoons grated Parmesan
- ½ teaspoon garlic powder
- ¼ teaspoon black pepper
- Salt to taste
Mix everything thoroughly until the ingredients form a thick, slightly sticky mixture.
The egg and cheese help bind the cauliflower together, while Parmesan adds savory flavor.
Step 4: Shape the cauliflower bread slices
Preheat your oven to 425°F (220°C).
Line a baking sheet with parchment paper.
Next, divide the cauliflower mixture into two equal portions.
Shape each portion into a square or rectangle approximately the size of a regular bread slice.
Aim for an even thickness of about ¼ to ⅜ inch.
Press the mixture firmly so the edges hold together.
Additionally, avoid making the crust too thick because the center needs to cook thoroughly.
Once you’ve shaped both slices, you’re ready to bake.
Baking the Crust and Creating the Perfect Cheese Melt
Now comes my favorite part: transforming the cauliflower mixture into golden, crispy bread alternatives.
Although the process takes a little patience, the results make the effort worthwhile.
Step 5: Bake the cauliflower crust
Place the baking sheet in your preheated oven.
Bake for approximately 18 to 22 minutes, or until the edges become golden brown and the tops look firm.
Next, carefully flip each crust using a wide spatula.
Return the baking sheet to the oven and continue baking for another 8 to 10 minutes.
This second baking stage helps both sides develop a firmer texture.
However, keep an eye on the crust during the final minutes because oven temperatures can vary.
When the crusts look golden and feel sturdy, remove them from the oven.
Allow them to cool for approximately 3 to 5 minutes before assembling your sandwiches.
This short resting period helps the crust maintain its shape.
Step 6: Add the cheese filling
Heat a nonstick skillet over medium-low heat.
Add approximately 1 teaspoon of butter or olive oil.
Next, carefully place one cauliflower crust slice in the skillet.
Layer your favorite melting cheese over the crust.
For a classic combination, I recommend sharp cheddar and mozzarella.
Then, place the second cauliflower crust on top to create your sandwich.
Press gently with a spatula without flattening the sandwich.
Step 7: Grill until golden and melted
Cover the skillet with a lid for approximately 1 minute.
The trapped heat helps the cheese melt without requiring excessive cooking time.
Next, remove the lid and continue cooking until the bottom becomes golden and crispy.
Carefully flip the sandwich using a wide spatula.
Cook the second side until it develops a beautiful golden crust and the cheese melts completely.
Generally, this final grilling stage takes approximately 2 to 4 minutes per side, depending on your skillet and heat level.
Finally, transfer the sandwich to a plate and let it rest for about 1 minute.
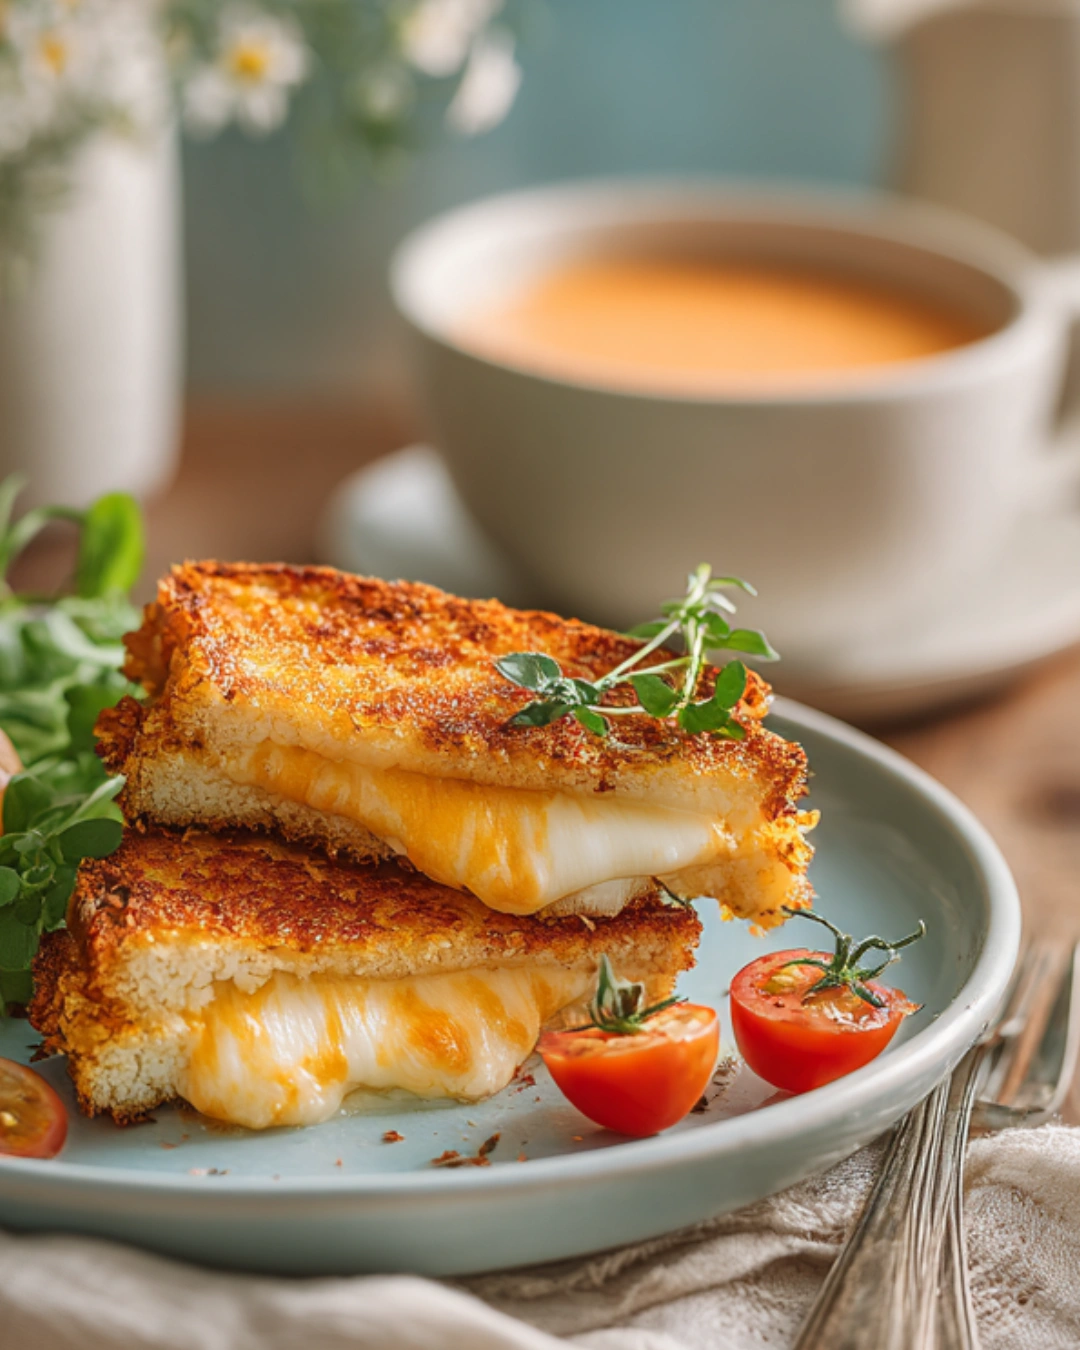
Then slice it diagonally to reveal the warm, melted cheese inside.
How to Know When Your Cauliflower Grilled Cheese Is Ready
Your Cauliflower Crusted Grilled Cheese Sandwiches should have three important characteristics.
First, the exterior should feel firm and slightly crispy rather than soft or wet.
Second, the cheese filling should melt completely and hold the two cauliflower slices together.
Finally, the sandwich should maintain its shape when you lift it with a spatula.
If the crust starts browning too quickly, reduce the heat slightly.
On the other hand, if the cheese hasn’t melted, cover the skillet briefly to trap additional warmth.
With these simple techniques, you can enjoy a delicious cauliflower grilled cheese sandwich that delivers the crispy texture and cheesy comfort of the classic version.
WHAT TO ADD TO CAULIFLOWER GRILLED CHEESE
This is where you can really make it yours. Cauliflower Crusted Grilled Cheese Sandwiches are a little like a blank canvas, but a delicious one that smells like toasted cheese.
Here are my favorite add ons, depending on my mood and what is in the fridge:
For extra flavor: a thin swipe of Dijon mustard, pesto, or garlic herb spread inside before the cheese.
For crunch: a few pickled jalapeños, dill pickles, or thin sliced red onion.
For protein: turkey, ham, crispy bacon, or even leftover grilled chicken.
For a pizza vibe: a spoon of marinara on the side for dipping and a little pepperoni inside.
A quick note: keep fillings thin. If you stuff it like a deli sandwich, it gets harder to flip and the crust can crack. I aim for one or two extras max, plus the cheese.
Serving idea that feels like lunch at a cafe: pair it with something fresh. I love a simple salad next to it, especially something like this avocado spinach salad with grilled chicken when I want to turn it into a real meal.
SOME MORE RECIPES TO TRY
Once you make Cauliflower Crusted Grilled Cheese Sandwiches and realize they are actually doable on a weeknight, you might start looking at your other comfort foods differently too. I do that all the time. Like, what else can I make crispy and cheesy without needing bread?
If you have extra cauliflower rice, you can use it for:
Cheesy cauliflower bites: mix with egg and cheese, scoop into little mounds, bake until golden.
Cauliflower hash: sauté with onions, peppers, and whatever leftover meat you have, then top with an egg.
Mini crust pizzas: press the same crust mixture into circles, bake, add sauce and cheese, bake again.
And if you are the type who loves dipping sauces, do not skip that. Even a simple ranch, spicy mayo, or tomato soup on the side makes it feel extra cozy.
MORE GRILLED CHEESE SANDWICHES
I will always love a classic grilled cheese, but it is fun to switch it up. The more you play with cheeses and fillings, the more you find your perfect combo.
Here are a few easy ideas you can try with your usual bread too, on nights when you are not doing the cauliflower crust:
Sharp cheddar plus apple slices: sweet, salty, and surprisingly addictive.
Mozzarella plus tomato: basically a caprese grilled cheese, especially good with basil.
Pepper jack plus leftover taco meat: add a little salsa for dipping.
But honestly, I keep coming back to Cauliflower Crusted Grilled Cheese Sandwiches because they hit that comfort food spot while still feeling lighter. They are not “diet food” at all. They are real food that just happens to use cauliflower as the base.
Common Questions
Can I use frozen cauliflower rice?
Yes. Just cook it and squeeze it very well. Frozen tends to hold more water, so take your time with the towel step.
Why is my crust falling apart?
It is almost always moisture or flipping too soon. Make sure the crust is browned and set on both sides, and let it cool a few minutes before assembling.
What is the best cheese for the middle?
I like a mix, usually cheddar for flavor and mozzarella for stretch. Provolone is also great if you want that smooth melt.
Can I make the crust ahead of time?
Yes. Bake the crusts, cool them, then refrigerate. Recrisp in the oven or a skillet before building your sandwich.
How do I store leftovers?
Wrap and refrigerate for up to 2 days. Reheat in a skillet or oven so it crisps again. Microwaving works, but it will soften.
Conclusion: Enjoy Your Homemade Cauliflower Crusted Grilled Cheese Sandwiches
Cauliflower Crusted Grilled Cheese Sandwiches prove that comfort food can be delicious, satisfying, and packed with vegetables. With their golden, crispy cauliflower crust and warm, gooey cheese filling, these sandwiches offer everything you love about classic grilled cheese with a creative twist.
The secret to success is simple: remove as much moisture as possible from the cauliflower, bake the crust until golden, and grill the sandwich over medium-low heat. These easy techniques help you achieve a sturdy crust, crispy edges, and perfectly melted cheese every time.
Plus, you can customize your sandwiches with different cheeses, fresh herbs, or your favorite fillings. Whether you’re preparing a quick lunch, a cozy dinner, or a low-carb alternative to traditional grilled cheese, this recipe deserves a spot in your kitchen.
So, grab some cauliflower, choose your favorite cheese, and give these homemade sandwiches a try. Once you experience that first crispy, cheesy bite, you might discover a new favorite way to enjoy grilled cheese!
If you want to compare methods, I found helpful inspiration from Cauliflower Crusted Grilled Cheese Sandwiches – Kirbie’s Cravings, plus this version on Cauliflower Grilled Cheese – Will Cook For Smiles, and another solid read at Cauliflower Grilled Cheese – Kirbie’s Cravings. Make it this week, take that first cheesy bite, and tell me you do not feel instantly happier.

Cauliflower Grilled Cheese
Ingredients
Method
- If using frozen cauliflower rice, microwave it and then let it cool. If using fresh, sauté it for a few minutes with a tiny splash of water, then cool.
- Squeeze out the moisture from the cauliflower rice using a clean kitchen towel. Ensure it is as dry as possible.
- In a bowl, mix the dried cauliflower rice with the egg, mozzarella, parmesan, salt, pepper, and garlic powder.
- Split the mixture into two piles on a parchment-lined baking sheet and shape each into a rectangle or square, about the size of bread slices.
- Bake at 425°F (220°C) for 18 to 22 minutes until the edges are browned and the top is set.
- Carefully flip each crust and bake for an additional 8 to 10 minutes until both sides are firm.
- Heat a pan over medium to medium-low heat. Add a little butter or oil.
- Place one crust on the pan, add your center cheese, and then top with the second crust.
- Cover the pan for a minute to allow the cheese to melt, then uncover and cook until the outside is crisp. Flip carefully and brown the other side.