
Swirled Pineapple Strawberry Slushie days usually happen in my kitchen when the weather feels too hot for anything except something icy, fruity, and cold enough to fog up the glass. I first made this drink because frozen pineapple and strawberries were taking over my freezer, and I wanted something faster than waiting for homemade popsicles to freeze. What came out of the blender looked far more impressive than the effort involved. The pineapple layer tastes bright and tropical, while the strawberry layer brings sweet berry flavor. Then you swirl them together just enough to create those pretty yellow and pink streaks. Better yet, this Swirled Pineapple Strawberry Slushie comes together in about 10 minutes.
- Why You’ll Love This Swirled Pineapple Strawberry Slushie
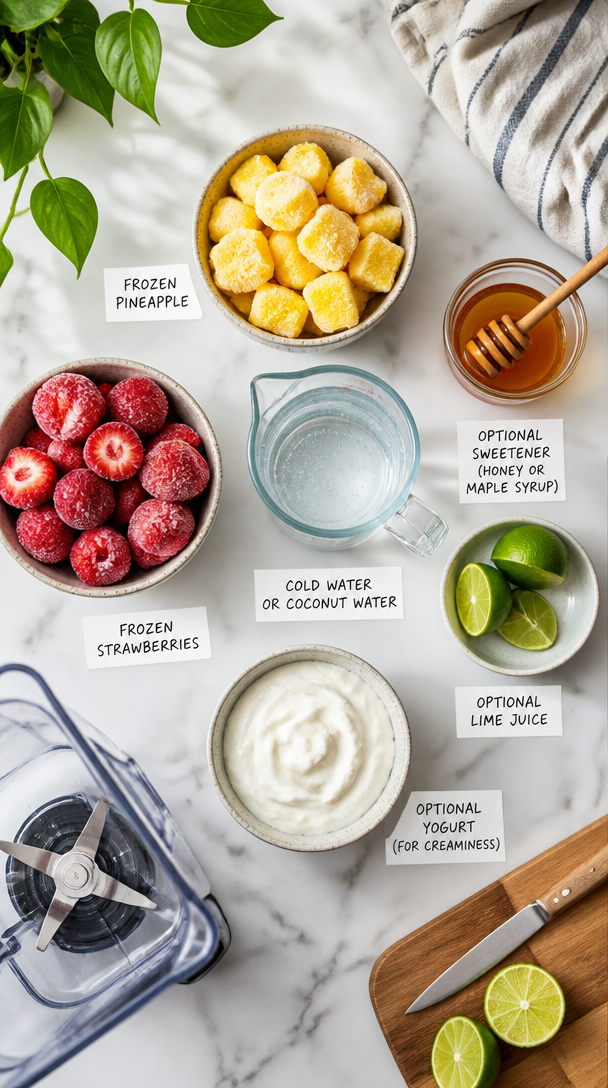
- Ingredients for a Pineapple Strawberry Slushie
- Suggested Ingredient Amounts
- NatHow to Make Swirled Pineapple Strawberry Slushie
- How to Get the Perfect Slushie Texture
- How to Keep the Pineapple Strawberry Layers Separate
- Swirled Pineapple Strawberry Slushie Variations
- Can You Make an Adult Pineapple Strawberry Slushie?
- What to Serve With a Pineapple Strawberry Slushie
- Can You Make Swirled Slushies Ahead?
- Turn Leftovers Into Popsicles
- Common Slushie Mistakes
- Common Questions
- One last sip before you go
Why You’ll Love This Swirled Pineapple Strawberry Slushie
There are plenty of frozen fruit drinks that taste good but turn into a watery mess within minutes. This one works because frozen fruit creates most of the icy texture instead of relying on a mountain of ice.
That small difference also gives you stronger fruit flavor.
A Fast Summer Drink
You don’t need to freeze a special base overnight.
If the pineapple and strawberries already live in your freezer, you can go from “I need something cold” to an icy drink in minutes.
First, blend the pineapple. Then blend the strawberries. Finally, layer and swirl.
That’s it.
Because each flavor gets blended separately, the finished drink keeps distinct pineapple and strawberry flavors rather than turning into one uniformly pink smoothie.
If pineapple is already one of your favorite warm-weather flavors, my pineapple turmeric smoothie gives you another refreshing way to use it.
Naturally Bright Fruit Flavor
Frozen fruit does most of the work here.
Pineapple brings tangy tropical sweetness. Meanwhile, strawberries add a softer berry flavor and beautiful color.
A little coconut water or cold water helps the blender move without making the mixture overly thin.
Then lime juice adds an optional bright finish.
You may not need sweetener at all. In fact, I always taste both fruit mixtures before adding honey or maple syrup because ripe frozen fruit can already taste plenty sweet.
Pretty Without Complicated Garnishing
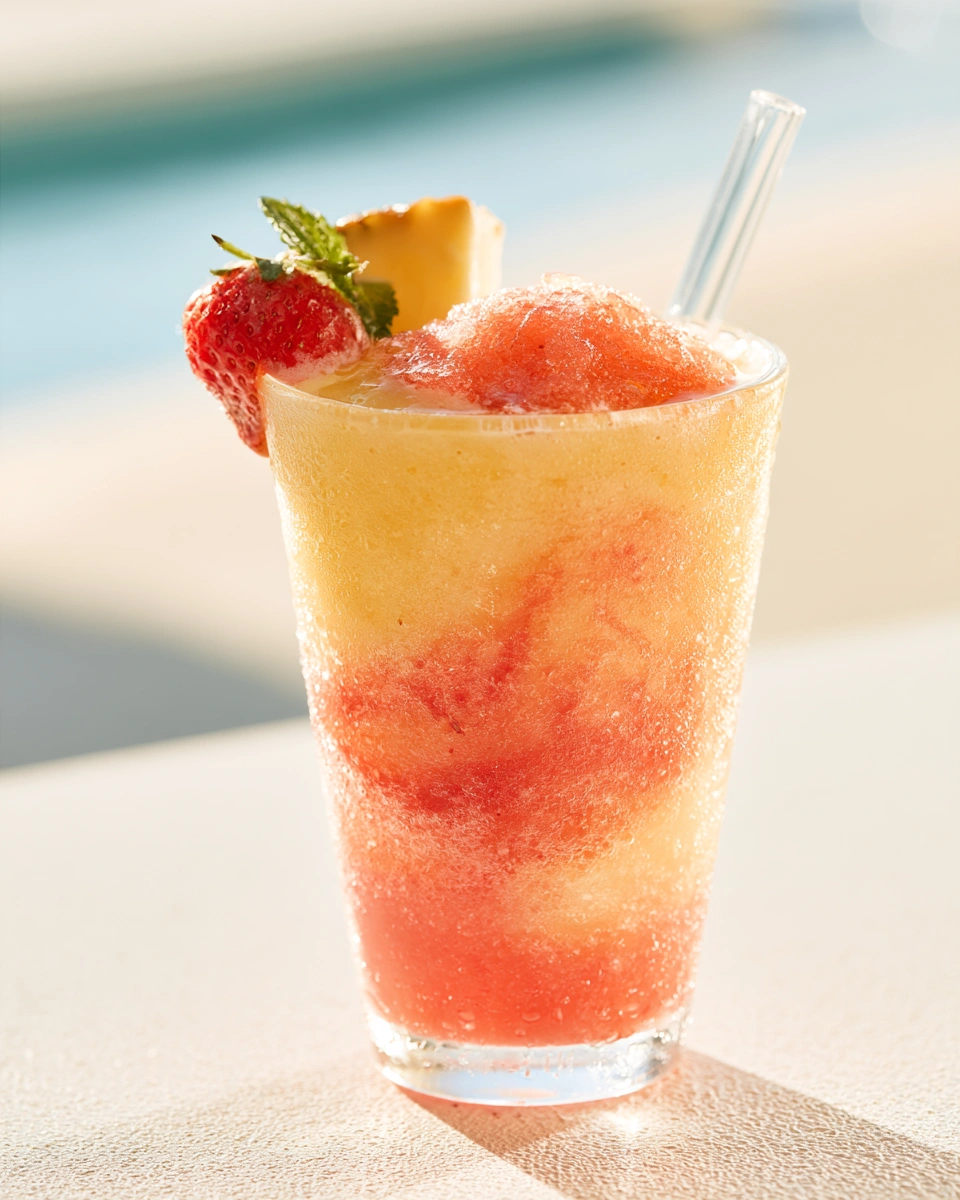
The swirl is the whole visual trick.
You don’t need whipped cream, fancy glassware, edible flowers, or six different toppings.
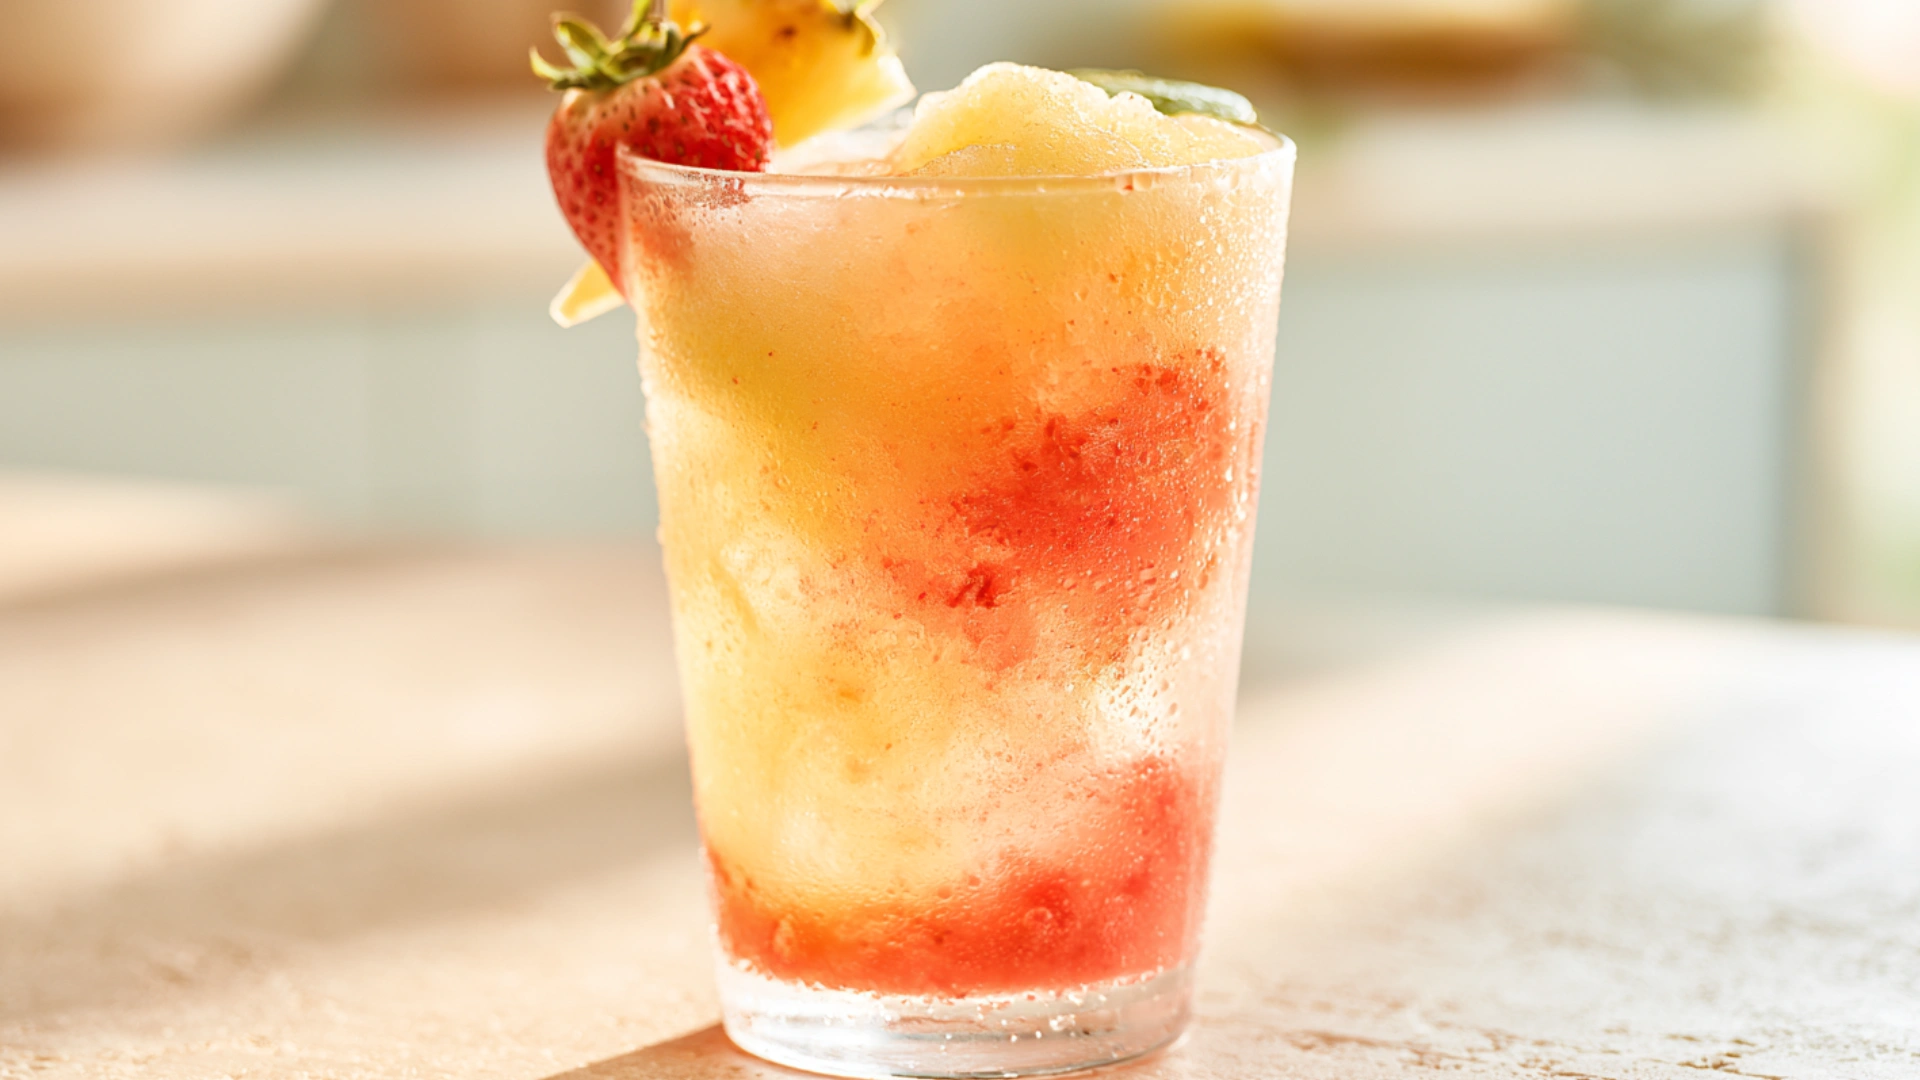
Instead, alternate spoonfuls of yellow pineapple slush and pink strawberry slush, then drag a spoon through the layers once or twice.
The key word is once or twice.
Too much swirling blends everything together and takes away that striped look.
| Recipe Detail | What to Expect |
|---|---|
| Prep time | About 10 minutes |
| Cooking required | None |
| Main ingredients | Frozen pineapple and strawberries |
| Texture | Thick, icy, and spoonable |
| Best for | Summer afternoons, pool days, parties, and snacks |
Ingredients for a Pineapple Strawberry Slushie
This recipe stays intentionally simple.
Still, getting the texture right depends on starting with frozen fruit and adding liquid gradually.
Frozen Pineapple
Frozen pineapple gives the yellow layer its thick, icy texture.
You can buy frozen pineapple chunks or freeze fresh pineapple yourself.
If freezing your own, spread pieces on a parchment-lined tray first. Freeze them until firm, then transfer them to a freezer-safe container.
That keeps the pieces from freezing into one giant block.
Frozen Strawberries
Use whole or sliced frozen strawberries.
Sliced berries usually blend a little faster, although either works.
If your blender isn’t especially powerful, let whole frozen strawberries sit at room temperature for a few minutes before blending.
Cold Water or Coconut Water
Both work.
Plain cold water keeps the fruit flavor clean and lets you control sweetness.
Coconut water adds subtle sweetness and tropical character, although the drink still tastes primarily like pineapple and strawberry.
Start with very little liquid.
You can always add another tablespoon, but you can’t remove excess liquid after the mixture becomes runny.
Optional Lime Juice
Fresh lime juice works particularly well in the pineapple mixture.
It sharpens the tropical flavor and keeps the slushie from tasting one-dimensional.
I usually add only a small squeeze.
Optional Sweetener
Honey, maple syrup, agave, or another sweetener can work.
However, don’t add it automatically.
Blend the fruit first, taste, and then decide.
Optional Yogurt
A spoonful or two of plain or vanilla yogurt changes the drink into something closer to a frozen smoothie.
It makes the layers creamier and slightly less icy.
If creamy fruit drinks are more your style, the peaches and cream smoothie is another easy warm-weather option.
Suggested Ingredient Amounts
| Ingredient | Suggested Amount | Purpose |
|---|---|---|
| Frozen pineapple chunks | 2 cups | Creates the tropical yellow layer |
| Frozen strawberries | 2 cups | Creates the berry layer |
| Cold water or coconut water | ½–1 cup total | Helps the frozen fruit blend |
| Fresh lime juice | 1–2 teaspoons | Adds brightness |
| Honey or maple syrup | To taste, optional | Adds sweetness when needed |
| Yogurt | 2–4 tablespoons, optional | Creates a creamier texture |
NatHow to Make Swirled Pineapple Strawberry Slushie
The process stays easy, but texture matters more than exact measurements.
Your goal is to make each flavor thick enough to hold its own layer in the glass.
Step 1: Chill the Glasses
This step isn’t mandatory, but I like it.
Place your serving glasses in the freezer for about 10 minutes while you gather the ingredients.
Cold glasses slow down melting and help those distinct layers remain visible longer.
Step 2: Blend the Pineapple Layer
Add frozen pineapple to your blender.
Start with a small splash of cold water or coconut water.
Then blend.
Stop and scrape down the sides as needed.
If the blades struggle, add more liquid one tablespoon at a time.
You want a thick consistency somewhere between a smoothie and sorbet.
The mixture should move through the blender, but it shouldn’t pour like juice.
Taste it.
Add lime juice or a little sweetener if needed.
Then transfer the pineapple mixture to a bowl or measuring cup.
Step 3: Blend the Strawberry Layer
You don’t necessarily need to wash the blender perfectly after the pineapple layer.
A quick rinse usually works because a little pineapple won’t hurt the strawberry mixture.
Add the frozen strawberries and another small splash of cold liquid.
Blend until thick and smooth.
Again, add liquid very gradually.
Taste before sweetening.
Some strawberries taste tart, while others bring plenty of sweetness on their own.
If you’re in a strawberry-drink mood, the strawberry banana protein shake gives you another fruity option that works especially well for breakfast.
Step 4: Start Layering
Take your chilled glasses from the freezer.
Spoon pineapple slush into the bottom of each glass.
Then add a layer of strawberry.
Continue alternating until the glasses look full.
Spoon rather than pour when possible.
Thick layers give you cleaner color separation.
Step 5: Create the Swirl
Insert a long spoon, butter knife, or reusable straw into the layered drink.
Drag it gently upward once.
Then make one more small movement if needed.
Stop.
Seriously, stop.
Overmixing takes your beautiful pineapple and strawberry layers and turns them into a single peachy-pink drink.
It will still taste good, but you’ll lose the reason we’re calling this a Swirled Pineapple Strawberry Slushie.
Step 6: Serve Immediately
Frozen fruit drinks don’t wait around gracefully in hot weather.
Serve as soon as you’ve created the swirl.
You can garnish the glass with a strawberry, small pineapple wedge, lime slice, or mint leaf.
However, the drink already looks colorful enough on its own.
“I made these after a pool afternoon, and the kids were convinced I’d bought some kind of fancy frozen drink machine. The blender did all the work, and the swirl made it look way more complicated than it was.”
How to Get the Perfect Slushie Texture
The most common problems with homemade slushies come down to liquid.
Too much liquid creates a smoothie or juice. Too little can leave the blender spinning uselessly around frozen chunks.
Start With Less Liquid Than You Think
Begin with a small amount.
Depending on your blender, fruit, and serving size, you may need surprisingly little.
Once the blades begin moving, give the mixture time to process before adding more.
Use Frozen Fruit Instead of Mostly Ice
Ice certainly makes drinks cold.
However, a large quantity also dilutes the fruit flavor as it melts.
Frozen fruit gives you both flavor and structure.
If you’re using fresh fruit, then ice becomes necessary. In that case, add it gradually.
Let Rock-Hard Fruit Soften Briefly
If your blender sounds like it’s preparing for battle, stop.
Let the fruit sit on the counter for 3 to 5 minutes.
That tiny bit of softening can make a huge difference without actually melting the fruit.
Use the Tamper if Your Blender Has One
A tamper helps push frozen ingredients toward the blades while the blender runs.
Follow your blender manufacturer’s instructions when using it.
If you don’t have one, stop the machine and scrape the sides manually.
Don’t push utensils toward moving blades.
How to Keep the Pineapple Strawberry Layers Separate
Clean layers come down to thickness and speed.
Make Both Mixtures Similar in Thickness
If the pineapple layer is thick but the strawberry mixture is thin, the strawberry portion will run straight through it.
Try to keep both blends similarly spoonable.
Work Quickly
The longer the first mixture sits at room temperature, the softer it becomes.
Have your glasses, spoon, and second layer ready.
Use Chilled Glasses
This small trick gives you more time before the outer edges melt.
Spoon Instead of Pour
Pouring from a blender pitcher can hit the bottom layer too forcefully.
Spoon each layer gently into place for cleaner stripes.
Swirl Once
One deliberate movement usually looks better than five nervous ones.
Think ribbons rather than fully blended colors.
Swirled Pineapple Strawberry Slushie Variations
Once you understand the base technique, you can make dozens of variations.
Creamy Pineapple Strawberry Slushie
Add plain Greek yogurt, vanilla yogurt, or coconut yogurt to each fruit layer.
Start with about 1 tablespoon per cup of fruit.
This makes the texture smoother and slightly more dessert-like.
Strawberry Lime Slushie
Add fresh lime juice to the strawberry layer instead of the pineapple.
That sharper berry-citrus combination works especially well when the strawberries taste very sweet.
Pineapple Coconut Version
Use coconut water as the liquid and add a spoonful of canned coconut milk to the pineapple blend.
Keep the coconut milk amount modest because extra fat can soften the icy texture.
Mint Strawberry Version
Blend a few fresh mint leaves into the strawberry layer.
Don’t add too many. You want a fresh background note rather than a drink that tastes like mouthwash.
Mango Pineapple Strawberry Slushie
Replace part of the pineapple with frozen mango.
Mango creates a thick, smooth texture and deepens the tropical flavor.
For another fruity drink with a bright color, the iced mango matcha latte brings mango into a completely different chilled drink.
Mixed Berry Strawberry Layer
Replace some strawberries with blueberries, raspberries, or blackberries.
You’ll get a deeper red-purple swirl.
The healthy mixed berry smoothie is another easy way to use a freezer full of mixed berries.
Can You Make an Adult Pineapple Strawberry Slushie?
Yes.
Rum, vodka, or tequila can work with the fruit flavors.
However, alcohol affects freezing and can thin the texture.
Therefore, start with a small amount and add it after the fruit has blended.
Too much alcohol can turn a thick slushie into a runny cocktail.
For parties, I prefer making the main batch alcohol-free and letting adults add a splash to individual servings.
That also keeps the recipe useful for everyone.
What to Serve With a Pineapple Strawberry Slushie
This drink naturally fits warm-weather food.
Think picnics, pool afternoons, brunches, cookouts, and casual summer snacks.
Fresh Fruit
A chilled fruit platter keeps things simple.
Pineapple, berries, melon, grapes, and oranges all work.
Light Brunch Foods
Serve the slushies with muffins, toast, pancakes, or yogurt bowls.
The drink already brings plenty of fruit flavor, so the rest of brunch doesn’t need to be complicated.
Summer Salads
A crunchy salad works well when you’re serving the slushie as part of lunch.
Fruit-based sides also make sense. For example, a simple fruit salad with peaches keeps the whole meal light and summery.
Desserts
For a dessert-style spread, serve the drinks with something strawberry-forward or creamy.
The keto strawberry cheesecake creates a richer contrast against the icy drink.
Can You Make Swirled Slushies Ahead?
You can prepare the components ahead briefly, but they’re best fresh.
Short-Term Prep
Blend each fruit flavor separately.
Transfer the mixtures to freezer-safe containers and freeze for around 20 to 30 minutes.
Then stir and layer.
This works well if you’re preparing several glasses for guests.
Longer Storage
If you freeze the mixtures for several hours, they’ll likely become much firmer.
Let them soften at room temperature for several minutes, then stir or briefly reblend.
The final texture may differ slightly from a freshly blended slushie.
Don’t Layer Too Early
Once you layer and swirl the drink, serve it soon.
The colors start merging as everything melts.
If presentation matters, do the final assembly immediately before serving.
Turn Leftovers Into Popsicles
This might be my favorite backup plan.
If you have leftover pineapple or strawberry slush, spoon alternating layers into popsicle molds.
Run a skewer through each mold once to create a swirl.
Then insert sticks and freeze until firm.
The result tastes almost identical but lasts far longer than a drink sitting on the counter.
Common Slushie Mistakes
This recipe stays simple, but a few things can work against you.
Adding Too Much Liquid
This is the biggest mistake.
Once the mixture gets watery, adding more frozen fruit is your only easy fix.
Start with less liquid.
Using Too Much Ice
Ice can help when you’re using fresh fruit, but too much weakens the fruit flavor.
Whenever possible, rely mainly on frozen pineapple and strawberries.
Over-Sweetening Before Blending
Frozen fruit sweetness varies.
Blend first and taste second.
You might discover that you don’t need additional honey or maple syrup at all.
Over-Swirling
Two colors need some separation for the swirl to show.
A few dramatic streaks look better than fully mixing the glass.
Letting the Mixture Sit Too Long
Slushies soften quickly.
Have everything ready before blending so you can move directly from blender to glass.
Common Questions
Can I make this ahead of time?
Yes, but it’s best fresh. If you blend it ahead, store each flavor separately in the freezer for up to a couple hours. Let it sit for a few minutes, stir, then swirl.
Do I have to use frozen fruit?
Frozen fruit makes the best texture. If you only have fresh fruit, add ice, but start small so it does not turn watery.
How do I keep the layers from mixing?
Blend both mixtures thick, and pour slowly. Also, do not over swirl. One or two gentle turns is enough.
What if my slushie is too thick to blend?
Add liquid one tablespoon at a time and stop to stir. Sometimes the fruit just needs a little help to get moving.
Can I turn it into popsicles?
Absolutely. Layer the pineapple and strawberry mixtures into molds and swirl lightly with a skewer. Freeze until solid.
One last sip before you go
Swirled Pineapple Strawberry Slushie looks like something you’d order on vacation, yet the actual recipe comes down to frozen fruit, a blender, and a few minutes.
That’s why I keep coming back to it.
You get bright pineapple, sweet strawberries, and a genuinely icy texture without making a complicated syrup or freezing anything overnight.
Most importantly, the swirl gives a very simple drink a little personality.
Blend both fruit mixtures thicker than you think you’ll need. Add liquid slowly. Chill the glasses when you have time. Then spoon in alternating layers and resist the urge to keep mixing.
One or two swirls are enough.
After that, find the coolest spot you can, grab a straw or spoon, and drink it before the summer heat has a chance to win.
If you need a quick way to cool down, this Swirled Pineapple Strawberry Slushie is a solid move. It’s easy, it tastes like real fruit, and the swirl makes it feel a little extra even on an ordinary Tuesday. If you want more ideas, I also like checking recipes like Pineapple Strawberry Swirl Slushie – BetterBody Foods and Easy Pineapple Strawberry Swirled Slushies – Recipes by Clare to see how other people tweak their blends. Now go grab that frozen fruit and make yourself a glass, because hot days don’t really wait for anyone.

Swirled Pineapple Strawberry Slushie
Ingredients
Method
- Add frozen pineapple to the blender with a splash of cold water or coconut water. Blend until thick and smooth, then pour into a bowl or measuring cup.
- Add frozen strawberries with a splash of liquid to the blender. Blend until thick. Taste and add honey or maple syrup if needed.
- Spoon the pineapple slush into your glass, followed by the strawberry slush, alternating layers.
- Use a long spoon or butter knife to gently swirl the layers. Be careful not to overdo it, as you want to keep the pretty streaks.